一、电路连接
需要以下几个外设
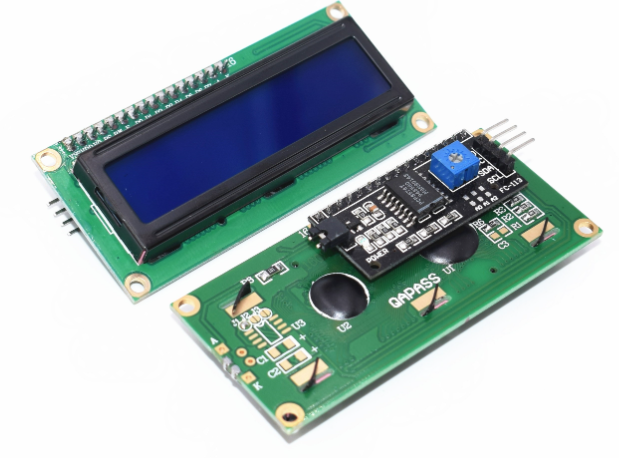
- LCD1602(IIC驱动)
- DS1302
- 1-WIRE温湿度检测器
- 红外接收器
- 遥控器
- 两个LED(一红一蓝)
- 蜂鸣器
LCD1602IIC
| LCD1602IIC引脚 | Arduino引脚 |
|---|---|
| VCC | 5V |
| GND | GND |
| SDA | A4 |
| SCL | A5 |
我这里的LCD1602是IIC的,所以只需要4根线
 ## 1-WIRE温湿度检测器
| 传感器引脚 | Arduino引脚 |
|---|---|
| - | GND |
| S | 8 |
| + | 5V |
 中间的线是要接5V的
红外接收器
| 红外接收器引脚 | Arduino引脚 |
|---|---|
| - | GND |
| + | 5V |
| S | 11 |
 ## DS1302
| DS1302引脚 | Arduino引脚 |
|---|---|
| VCC | 5V |
| GND | GND |
| RST | A0(14) |
| DAT | A1(15) |
| SCK | A2(16) |
 ## 蜂鸣器
| 蜂鸣器引脚 | Arduino引脚 |
|---|---|
| - | GND |
| + | 5V |
| I/O | 5 |
 ## LED
| LED引脚 | Arduino引脚 |
|---|---|
| 红色LED | 6 |
| 蓝色LED | 7 |

二、程序
这里需要下载4个库:
- dht11
- LiquidCrystal_I2C
- IRremote
- DS1302
我把他们都传到我的Github里面了:SmartClock
程序里面的红外遥控器是按任何一个按键都可以切换模式,因为我这个遥控器的解码有点问题,可能是这个库的时序问题,大家可以自己个性化自己的按键,改一下就能用了
## 功能简介
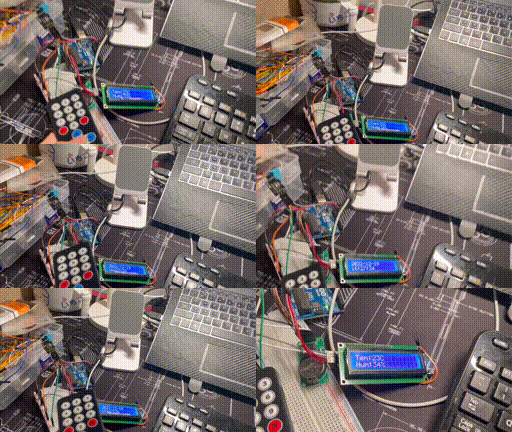
LCD1602屏默认显示温度和湿度,在按下遥控器任何一个按键时,LCD1602屏显示时间,再按下显示温度和湿度。温度湿度还有时间数据都会在串口打印出来,方便调试。在温度高于一定阈值之后,亮红灯,在湿度低于一定阈值后,亮蓝灯。时钟到设定的时间后,蜂鸣器叫10声。
1
2
3
4
5
6
7
8
9
10
11
12
13
14
15
16
17
18
19
20
21
22
23
24
25
26
27
28
29
30
31
32
33
34
35
36
37
38
39
40
41
42
43
44
45
46
47
48
49
50
51
52
53
54
55
56
57
58
59
60
61
62
63
64
65
66
67
68
69
70
71
72
73
74
75
76
77
78
79
80
81
82
83
84
85
86
87
88
89
90
91
92
93
94
95
96
97
98
99
100
101
102
103
104
105
106
107
108
109
110
111
112
113
114
115
116
117
118
119
120
121
122
123
124
125
126
127
128
129
130
131
132
133
134
135
136
137
138
139
140
141
142
143
144
145
146
147
148
149
150
151
152
153
154
155
dht11 dht; //实例化一个对象
char buf1[50];
char buf2[50];
LiquidCrystal_I2C lcd(0x27,16,2); //这里是0x27
DS1302 rtc(14, 15, 16); //对应DS1302的RST,DAT,CLK
int RECV_PIN = 11; //红外线接收器OUTPUT端接在pin 11
int Keynum=1;
IRrecv irrecv(RECV_PIN); // 定义IRrecv 对象来接收红外线信号
decode_results results; //解码结果放在decode_results构造的对象results里
void initRTCTime(void)//初始化RTC时钟
{
rtc.writeProtect(false); //关闭写保护
rtc.halt(false); //清除时钟停止标志
Time t(2022, 12, 19, 16, 25, 50, 4); //新建时间对象 最后参数位星期数据,周日为1,周一为2以此类推
rtc.time(t);//向DS1302设置时间数据
}
void printTime()//打印时间数据
{
Time tim = rtc.time(); //从DS1302获取时间数据
snprintf(buf1, sizeof(buf1), "%04d-%02d-%02d ",
tim.yr, tim.mon, tim.date
);
snprintf(buf2, sizeof(buf2), "%02d:%02d:%02d",
tim.hr, tim.min, tim.sec);
Serial.println(buf1);
Serial.println(buf2);
}
void setup() //初始化函数,只执行一次
{
Serial.begin(9600); //设置波特率参数
pinMode(dht11Pin, OUTPUT); //通过定义将Arduino开发板上dht11Pin引脚(8号口)的工作模式转化为输出模式
pinMode(ledBlue, OUTPUT);
pinMode(ledRed, OUTPUT);
pinMode(beep, OUTPUT);
lcd.init(); // 初始化LCD
lcd.backlight(); //设置LCD背景等亮
initRTCTime();
irrecv.enableIRIn(); // 启动红外解码
delay(2000);
}
void loop() //loop函数,重复循环执行
{
if (irrecv.decode(&results)!=0)
{
delay(500);
Keynum++;
delay(500);
lcd.clear();
if(Keynum>=3)
{
Keynum=1;
}
irrecv.resume();
}
switch(Keynum)
{
case 1: SerialTem();ther();TemJudge();alarm();break;
case 2: printTime();TemJudge();
Time tim = rtc.time(); //从DS1302获取时间数据
lcd.setCursor(0,0);
lcd.print(buf1);
lcd.setCursor(0,1);
lcd.print(buf2);
alarm();
break;
default: break;
}
}
void ther()//温湿度计
{
int tol = dht.read(dht11Pin); //将读取到的值赋给tol
int temp = (float)dht.temperature; //将温度值赋值给temp
int humi = (float)dht.humidity; //将湿度值赋给humi
lcd.setCursor(0,0);
lcd.print("Tem:");
lcd.setCursor(4,0);
lcd.print(temp);
lcd.setCursor(6,0);
lcd.print("C");
lcd.setCursor(0,1);
lcd.print("Hum:");
lcd.setCursor(4,1);
lcd.print(humi);
lcd.setCursor(6,1);
lcd.print("%");
}
void TemJudge()
{
int tol = dht.read(dht11Pin); //将读取到的值赋给tol
int temp = (float)dht.temperature; //将温度值赋值给temp
int humi = (float)dht.humidity; //将湿度值赋给humi
if(temp>=20)//假如温度高于20度亮红灯
{
digitalWrite(ledBlue,HIGH);
}
else digitalWrite(ledBlue,LOW);
if(humi>=34)//假如湿度高于34%亮蓝灯
{
digitalWrite(ledRed,HIGH);
}
else digitalWrite(ledRed,LOW);
}
void alarm()
{
digitalWrite(beep,HIGH);
int alarm_hr=16;//设置闹钟小时
int alarm_min=26;//设置闹钟分钟
int alarm_sec=0;//设置闹钟秒
Time tim = rtc.time(); //从DS1302获取时间数据
snprintf(buf2, sizeof(buf2), "%02d:%02d:%02d",
tim.hr, tim.min, tim.sec);
if((tim.hr==alarm_hr)&&(tim.min==alarm_min)&&(tim.sec==alarm_sec))
{
for(int i=0;i<20;i++)
{
digitalWrite(beep,LOW);
delay(100);
digitalWrite(beep,HIGH);
delay(100);
}
}
}
void SerialTem()//串口打印温度湿度
{
int tol = dht.read(dht11Pin); //将读取到的值赋给tol
int temp = (float)dht.temperature; //将温度值赋值给temp
int humi = (float)dht.humidity; //将湿度值赋给humi
Serial.print("Temperature:"); //在串口打印出Tempeature:
Serial.print(temp); //在串口打印温度结果
Serial.println(".C"); //在串口打印出℃
Serial.print("Humidity:"); //在串口打印出Humidity:
Serial.print(humi); //在串口打印出湿度结果
Serial.println("%"); //在串口打印出%
}


